

Vinyl Flooring is a great choice to upgrade your floor. An economical floor which prices differ upon the thickness, brand and pattern and has many benefits. First of all, Vinyl flooring is less expensive than more types of floors like Hardwood and laminate floors. Also, Vinyl floor is easy to clean, with its resistant to water and dirts, and using rights detergents. Thus Vinyl Floor will helps you keep your house clean. Plus, Vinyl floor has a good appear, with its different and various types, it can take wood look or natural appear to your home. Thus, it gives your home a good sense of style and a comfort design. Finally, Vinyl flooring is easy to install. And it can be used in many locations, such as living rooms, bedrooms, bathrooms, kitchens, and even recreational vehicles.
So, if you are thinking to do it yourself without getting help from a construction worker, here’s the steps to it.
1-Prepare Your Floor
Firstly, prepare yourself and your Vinyl flooring. Measure the room you want to fix its floor with a measuring tape to carefully determine. This facilitates to determine how many boxes of planks (siding) you need to buy. Don’t forget to buy some extras as a substitutional planks. You can buy 10% more flooring than you need.
2- Empty Your Floor
Remove anything that faced your floor, such as fridge, the baseboards in bathroom, and free standing furniture.
You don’t need to take out cabinets or vanities because flooring can placed and installed around them.
3-Remove Old Flooring
As third step, remove the old flooring. It is a necessarily step especially when you have carpet. However, being a rigid, dry and thick floor, Vinyl flooring can cover any other floor surface. Don’t forget to take out the threshold strips that faced and trim out the doorways. Also, remove dust and debris with a broom. Plus sweep up any lingering adhesive with a paint scraper. If you want to not remove the old flooring, remember that the floor will be a bit higher and you may have to trim the bottom of the doors to fit the height.
4-Paper Template
Get a paper template where you can draw your plan. This will help you to get precise measurements, and makes cutting Vinyl floor much easier.
Especially when you are working with a large and big room such as living room and dinning room, you must have to make a paper template.
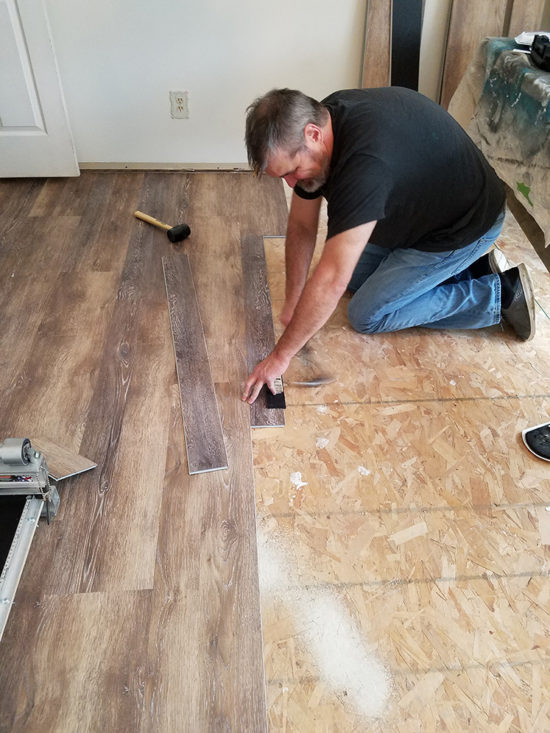
5- Cut Planks Of Vinyl Flooring
Cut your first and last rows with taking into consideration splitting the difference. If you are cutting a new plank greater than 3.5 inches, consider splitting the difference and cutting matching first and last planks. Divide the number by two and cut two sets of planks. You can, for example, have a first plank with a width of 2.6 inches and a last plank with a width of 2.6 inches to perfectly match them if you need the last plank to be 5.2 inches wide. Also, cut some cutouts.
6-Adjoin Your Planks
As soon as you have cut out the plank, attach it to the adjoining plank at an angle while holding the cut-out plank upward. Then slowly fold down the cut-out plank until it is joined with the adjoining plank. Then cover your floor with your new Vinyl flooring until covering all the floor. Make sure to reinstall your trim modelings after finishing.

